Dynamic Content Modeling
Case Study: Arnot Health Orthopedics
This article will explain the general principles used to implement a front-end with a headless CMS so that page components, and the content within them, can be re-arranged and updated on the fly, without ever having to do a software release.
Background
The orthopedic department at Arnot Health, a major hospital system in southern NY, needs to be able to create unique patient resource pages for each condition they treat – from joint replacements and tendon tears to various dislocations and fractures.
The headless CMS, Storyblok, was chosen to accomplish this. A headless CMS provides the physicians at Arnot Health with:
- A drag-and-drop interface to create, update, or delete pages and content
- Unique combinations of custom components to display content
- An intuitive, file-based repository to store media and documents
- Generous hosting and server uptimes
Now, the team can easily create and re-organize whole condition pages down to the component level. Most importantly, patients get medical resources specifically tailored to their condition and treatment.
Headless CMS
This article is not intended to review how a headless CMS works. Many platform providers have excellent online resources if you're interested in learning more. Here are a few reputable options: Contentful, Sanity, Strapi, Storyblok, and Hygraph.
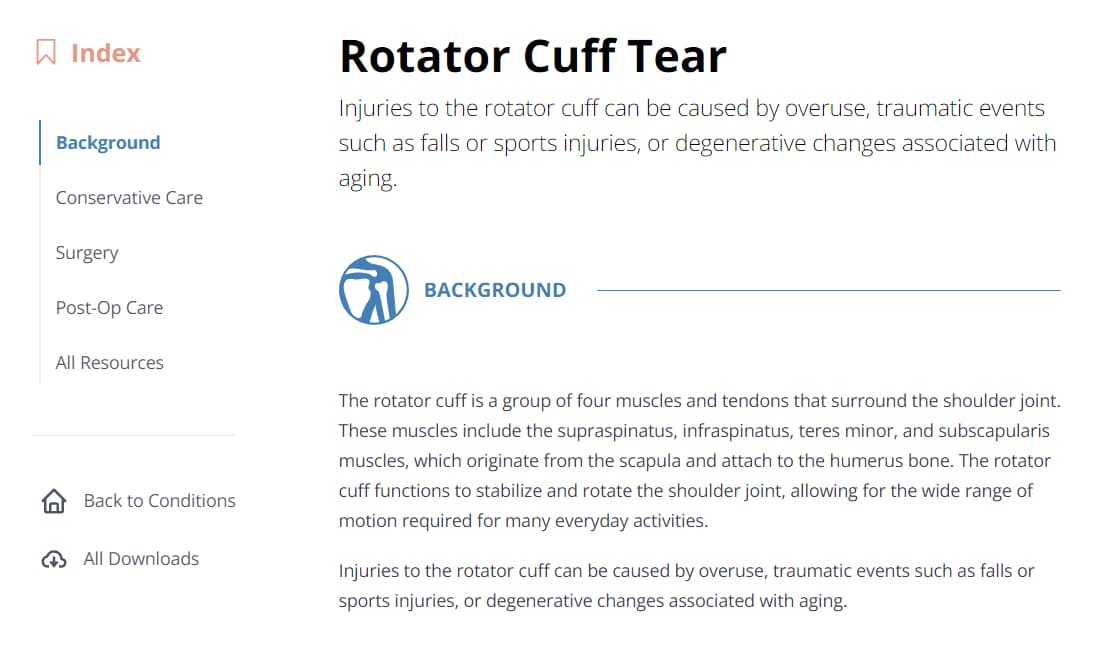
When constructing a new condition page, doctors first select from one or more pre-defined categories to logically divide treatment information. These categories ultimately create the page's index.
- Background
- Conservative Care
- Surgery
- Pre-Op Care
- Post-Op Care
- Resources
Then, within each index category, doctors enter their content into a custom mix of pre-made components. These components can be added, removed, duplicated, and re-organized using a drag-and-drop interface.
- Rich-text Paragraph
- Media Carousel
- Video with Description
- Dropdown Card
- Info Card
- Accordion
- Link List
- Download List

On top of it, some components contain others as optional sub-components. For example, a Media Carousel can be used standalone or inserted into a Paragraph, an Accordion can contain Download Lists, and so on.
The potential combinations are massive. The result is that no two condition pages are the same.
Front-End Code
The front-end code makes REST API calls to fetch the condition data from the headless CMS. The data is organized into an array of components. Because of this, the front-end can map the data to matching UI components to know how the content should be displayed, and in what order.
If the CMS is updated, the front-end will get the new data at the next API call and display it accordingly. Each time the web page loads, the front-end UI is being determined - nothing is hard coded.
The code in this tutorial uses NEXT.js and React.js. The headless CMS data is mocked as a parsed JSON response.
Steps
- Create a file called,
Paragraph.jsxin the /components folder. - Copy the code below and paste it into the new component file. Note, if using VS Code, press Shift+Alt+F for Windows (Cmd+k+f for Mac) to quickly fix any formatting issues.
- Create another file called,
Hero.jsxin the /components folder. - Copy the code below and paste it into the new component file.
- Create a file called,
Theme.jsin the /components folder. - Copy the code below and pase it into the new Theme file. This file contains a
COMPONENTSobject that lists all of the available components. - In the page file for the project, copy and paste the code below (note, this example uses the homepage, or
index.js).
/src/components/Paragraph.jsx
    function Paragraph(props){

        const { body } = props;

        return(
            <section>
                <p>{ body }</p>
            </section>
        )
    }
/src/components/Hero.jsx
    export default function Hero(props){

        const { title, subtitle, imageURL } = props;

        return(
            <section>
                <div>
                    <h2>{ title }</h2>
                    <h4>{ subtitle }</h4>
                </div>
                <div>
                    <img src={imageURL} alt="image hosted by CMS">
                </div>
            </section>
        )
    }
/src/components/Theme.js
    import Hero from './Hero'
    import Paragraph from './Paragraph'

    // A list of all potential components that could be displayed.
    const COMPONENTS = {
        Hero: Hero,
        Paragraph: Paragraph,
    }
/src/pages/index.js
    import { COMPONENTS } from '../components/Theme'

    // A built-in NEXT.js function
    // Used to statically render data on the server.
    // Typically used to fetch and revalidate API data.
    export async function getStaticProps() {

        /*
        **  Make an API call to your CMS.
        **  Below is an example, parsed response.
        */
        const apiResponse = [
            {
                id: 0,
                component: 'Hero_Component',
                title: 'Hero Title',
                subtitle: 'Subtitle',
                imageURL: 'Image',
            },
            {
                id: 1,
                component: 'Paragraph_Component',
                body: 'Paragraph'
            },
        ];

        /*
        **  Map CMS component name to front-end component name.
        **  Normalize the data for your component props.
        */
        const normalizedData = apiResponse.map((item) => {
            switch(item.component) {
                case 'Hero_Component':
                    return {
                        component: 'Hero',
                        id: item.id,
                        title: item.title,
                        subtitle: item.subtitle,
                        imageURL: item.imageURL,
                    }
                case 'Paragraph_Component':
                    return {
                        component: 'Paragraph',
                        id: item.id,
                        body: item.body,
                    }
                default: return [];
            }
        });

        return {
            props: {
                data: normalizedData,
            }
        }
    }

    // The main function used to display all page content.
    export default function Home({ data }) {

        // Map the component name to the component function
        // and then pass in all associated props.
        const getComponent = (item) => {
            if(typeof COMPONENTS[item.component] !== 'undefined') {
                const Component = COMPONENTS[item.component]
                return <Component {...item} />
            } else {
                return (<></>)
            }
        }

        // Create an array of front-end components from the data prop.
        // This array will be used to display the page UI.
        const components = data.map((item) => {
            return getComponent(item)
        })

        // The array of components are displayed in order.
        return (
            <main>
                {
                    components.map((component, index) => (
                        <div key={index}>
                            { component }
                        </div>
                    ))
                }
            </main>
        )
    }